XJ Cherokee – Rear Auxiliary Battery

A rear auxiliary battery install for the XJ that treats power like a system: solid mounting, protected cable paths, source-side fusing, and distribution that can be inspected on the trail.

XJ Cherokee rear battery - hero
xj battery hero xj battery 1 xj battery 2 xj battery 3 xj battery 4
ElectricalFabricationXJ CherokeeAux PowerWiring
Overview

A rear battery install that gives an XJ useful auxiliary power without turning the cargo area into a wiring problem.

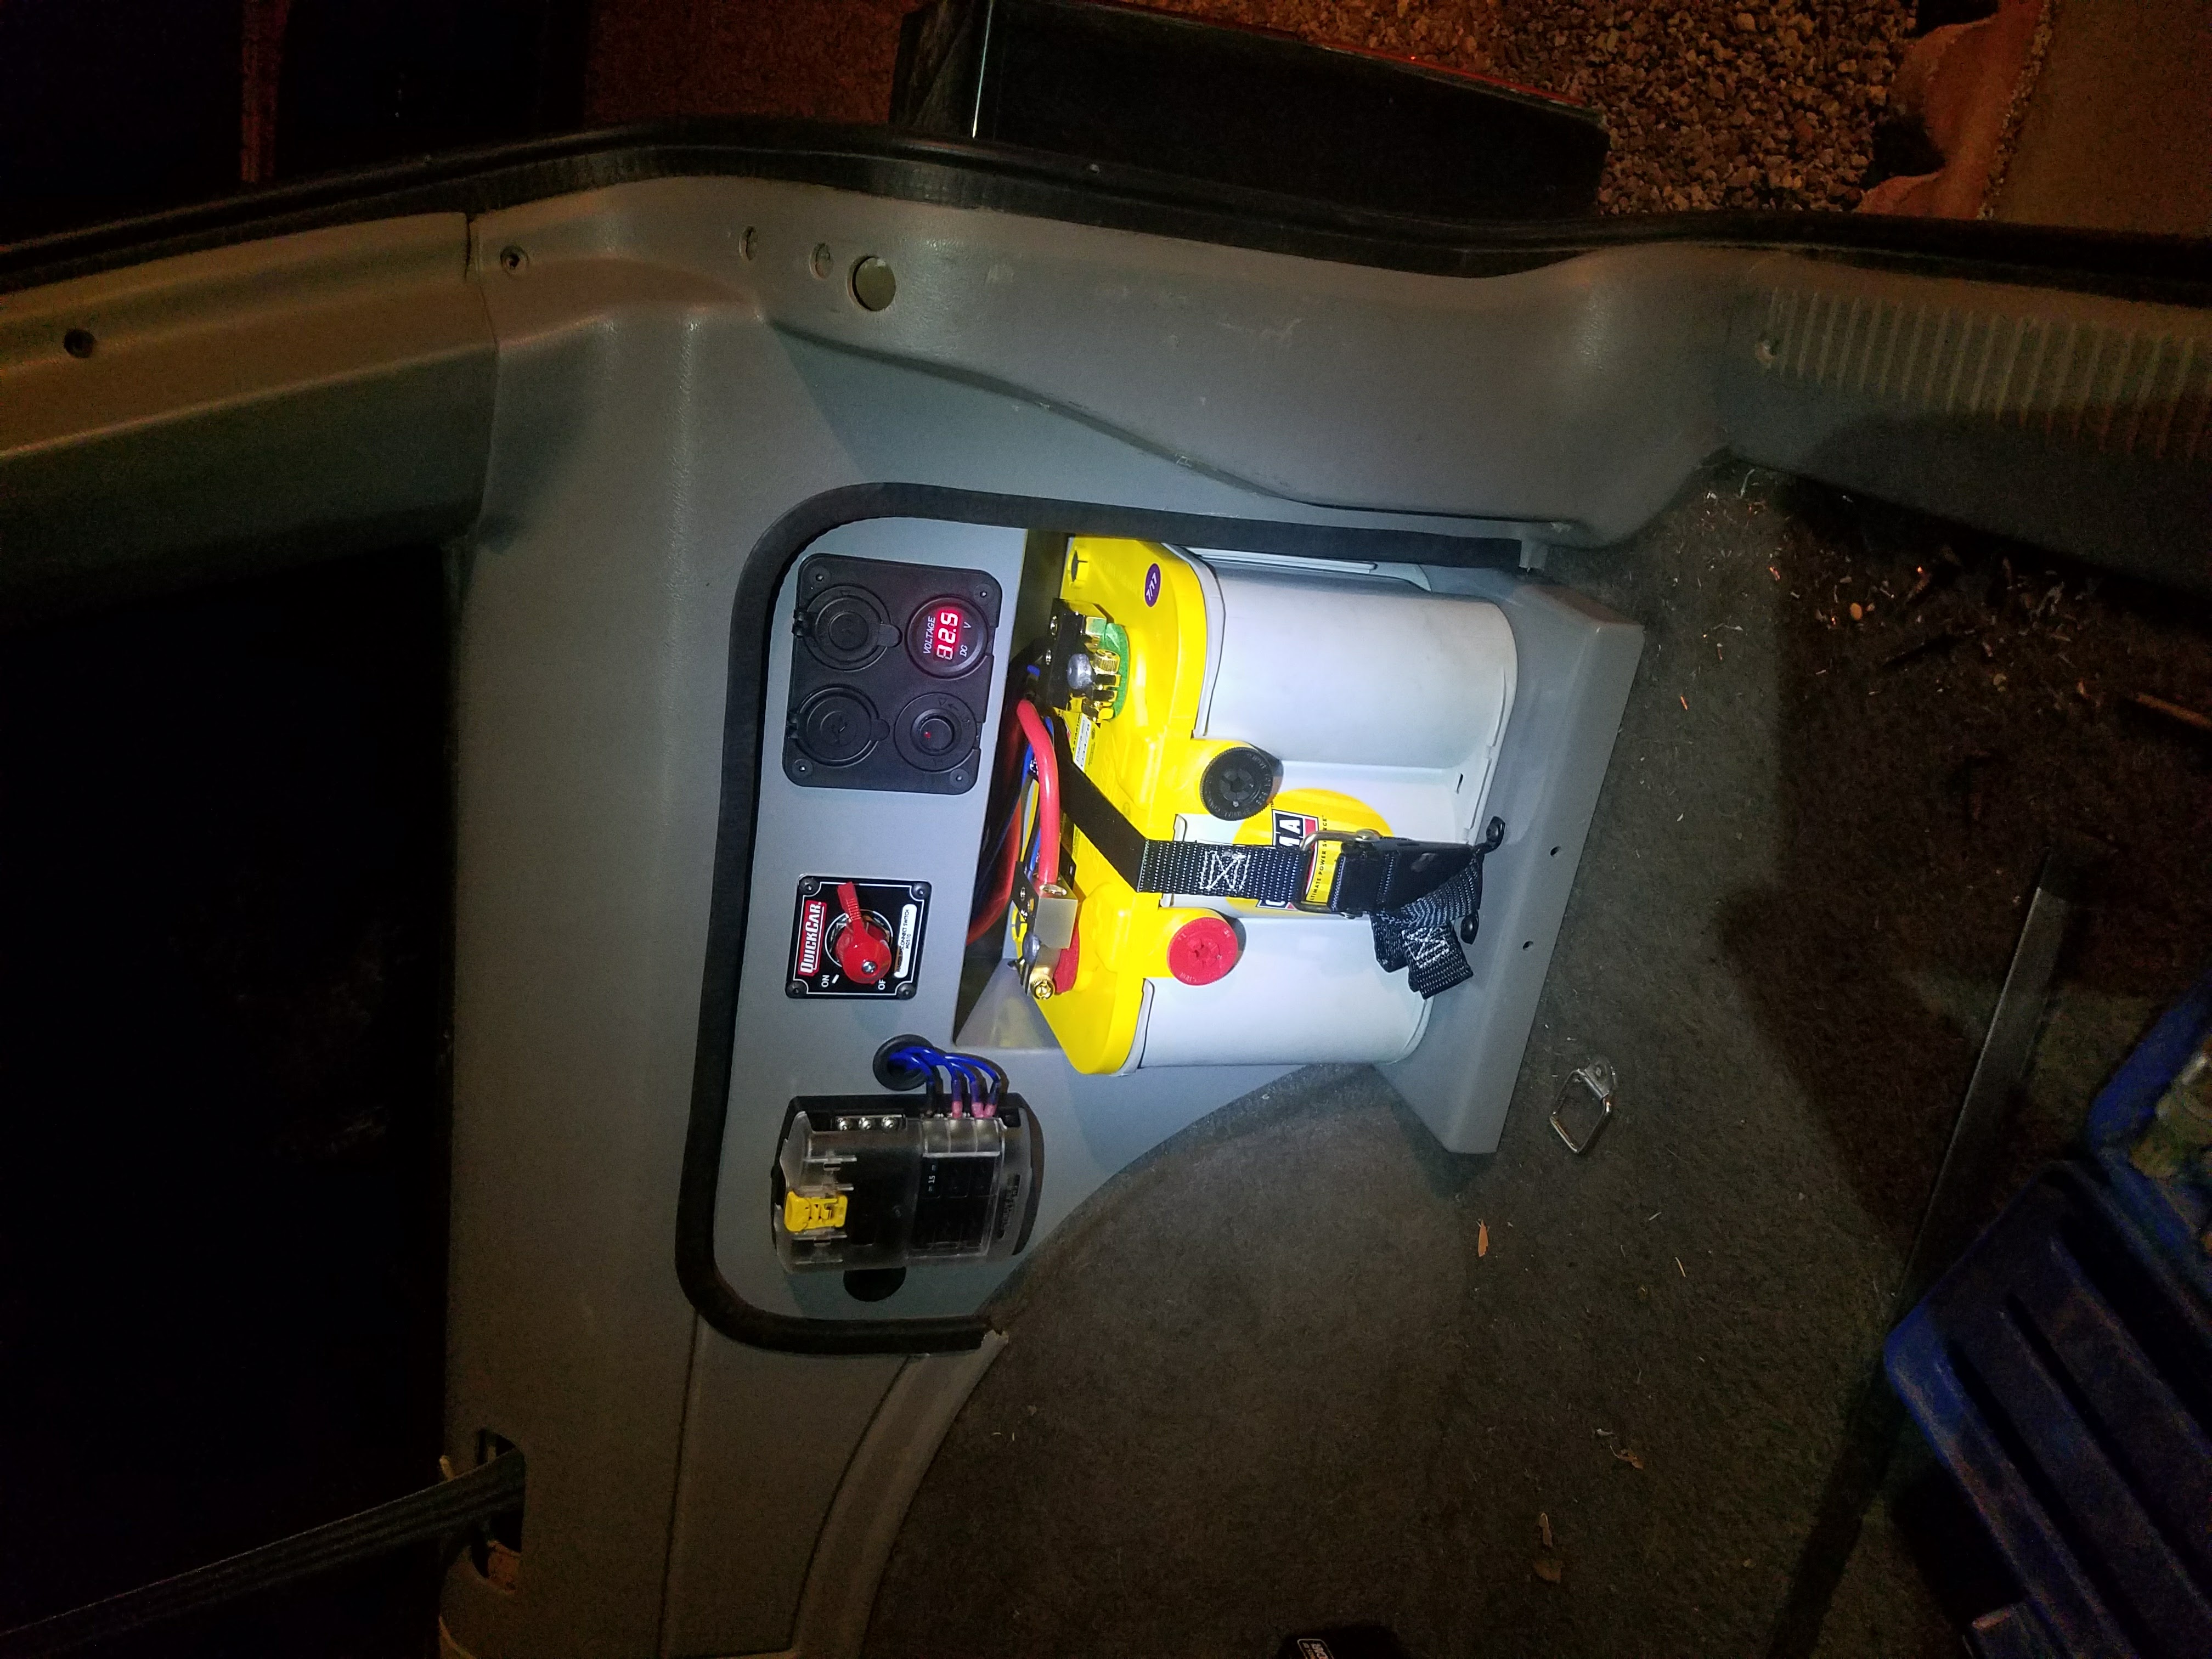
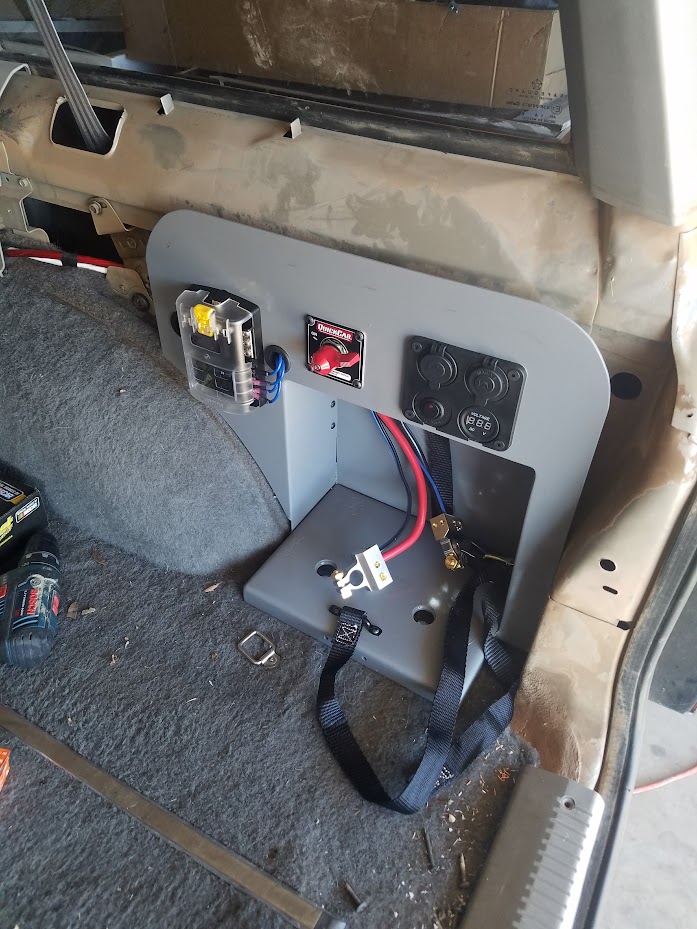
The XJ does not give you much extra electrical headroom, and trail gear has a habit of growing one circuit at a time. This install adds a rear-mounted auxiliary battery with a welded tray, protected cabling, and clean distribution for the kind of loads that make camp and recovery easier: fridge, lights, compressor support, comms, USB charging, and a small inverter when needed.

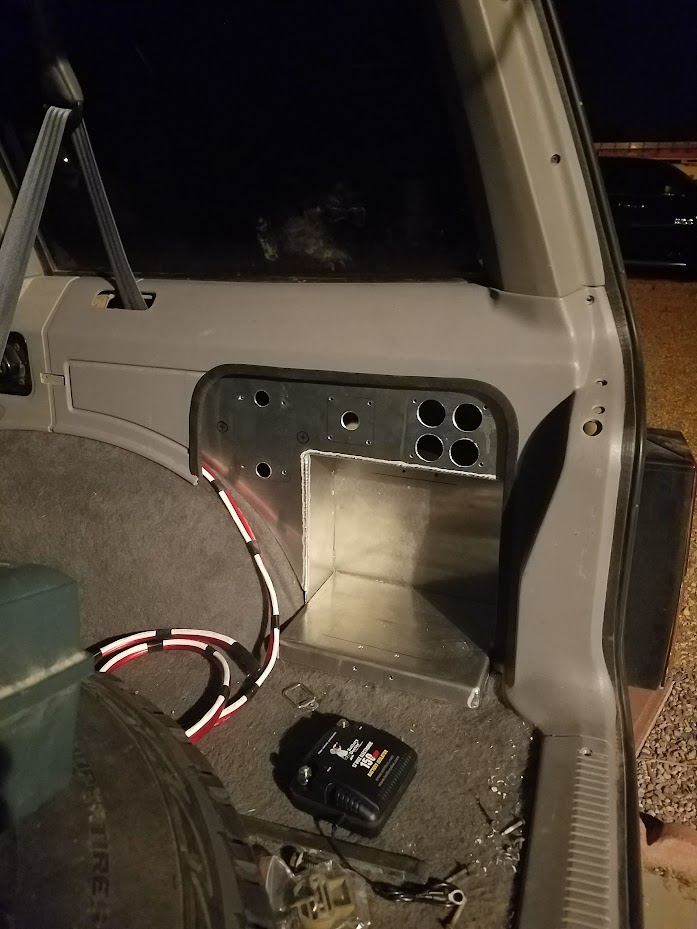
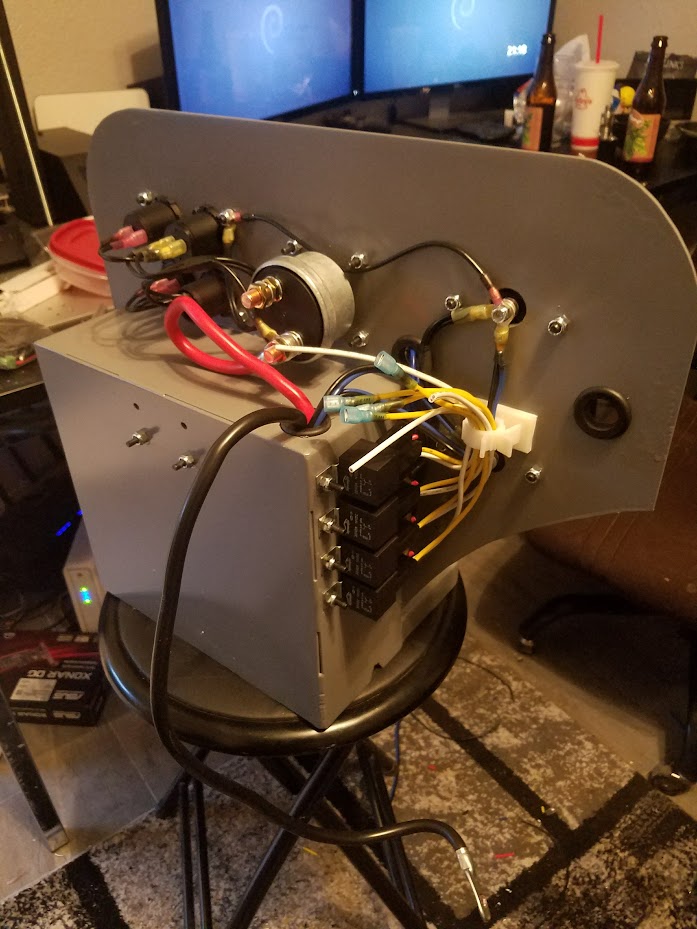
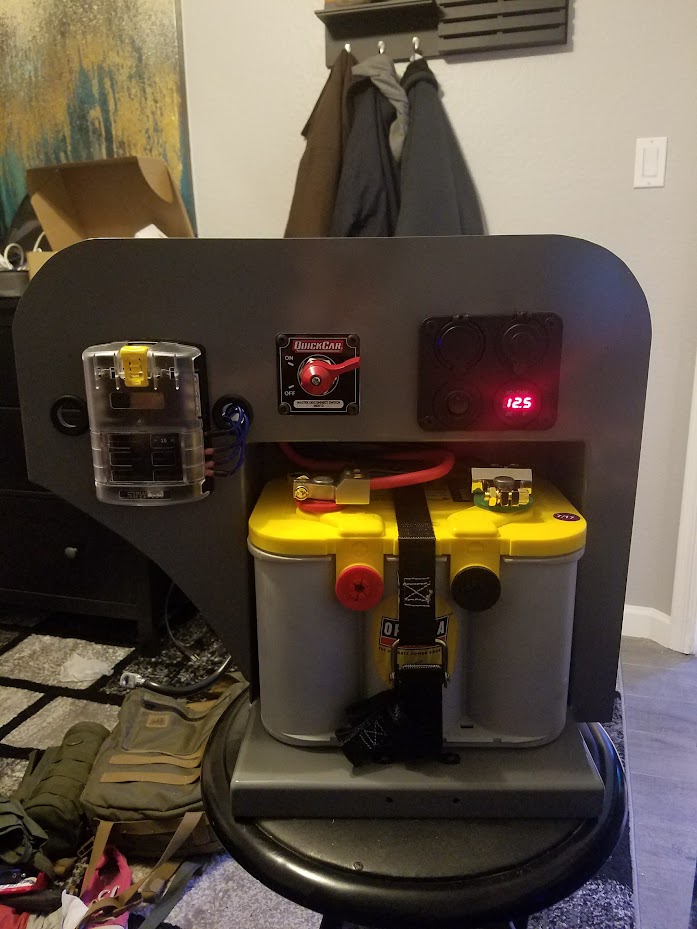
The tray and hold-down are welded steel and anchored to structure instead of trim, so the battery stays where it belongs under braking, washboard, and trail chatter. The main positive lead is protected at the source, cable runs are sleeved and grommeted wherever they can rub, and the accessory circuits land on a labeled fuse block so future changes do not turn into a mystery bundle.


Goal
Reliable auxiliary power without compromising cargo space or safety.
Approach
Secure mount, short protected runs, correct fusing, and a clean distribution point.

Do the boring parts right: mount the battery like cargo, fuse the wire like it can short, and label it for the tired version of you.

At a Glance
Platform
Jeep Cherokee (XJ)
Mount
Welded steel tray + mechanical hold-down
Protection
Source-side fuse, abrasion sleeves, grommeted pass-throughs
Distribution
Labeled fuse block + bus bars for accessories
Use Cases
Fridge, lights, air, comms, small inverter
Service
Accessible fuses and terminals for quick checks
Electrical Plan
What the rear battery feeds
  • Fridge and camp loads that need to run with the Jeep parked.
  • Interior/camp lighting, USB charging, radio support, and small 12V accessories.
  • Compressor or recovery-adjacent loads only through the circuits sized for that draw.
  • Small inverter use kept realistic so the battery system is not treated like shore power.
What the wiring has to survive
  • Vibration from washboard roads and trail chatter.
  • Cargo shifting against panels, terminals, and cable exits.
  • Sharp sheet-metal edges anywhere wire passes through the body.
  • Troubleshooting at night, when labels and clean routing matter most.
Build Notes
  • The battery mount is treated like a safety part, not a convenience bracket. A loose battery in an XJ cargo area is too much mass to trust to interior plastic.
  • The main positive conductor gets overcurrent protection near the battery before the cable has a chance to run through the vehicle unprotected.
  • Every pass-through needs a grommet, sleeve, or abrasion plan. If the wire can touch metal, vibration will eventually make that contact matter.
  • Accessory circuits belong on their own fused outputs. Shared mystery splices are how a simple fridge problem becomes a whole-truck electrical hunt.
My Take

Power mods fail where you cannot see them. The glamorous part is the extra capacity, but the important part is how the system behaves when something rubs through, a terminal loosens, or you need to diagnose a dead accessory away from home.

I would rather have a modest, clearly fused, boring-looking auxiliary system than a huge battery stuffed into the back with heroic cable runs and unlabeled branches. Keep the runs deliberate, avoid sharp edges, leave room for tools, and make the next inspection obvious.

What I'd Do Next
  • Add a smart isolator or DC-DC charger for better alternator charging control.
  • Remote voltmeter/ammeter at the dash for quick health checks.
  • Anderson-style exterior port for compressor or jump service.
Pre-Trip Checks
Before the trail
  • Check hold-down tension and make sure the battery cannot slide, tip, or contact cargo.
  • Inspect cable exits, loom, and grommets for rub marks before they become copper exposure.
  • Confirm fuses match the protected wire and circuit, not wishful accessory demand.
  • Verify the charging path and isolator/charger behavior before trusting overnight loads.
Things I would not copy blindly
  • Wire gauge, fuse size, and charging gear depend on actual load, cable length, battery chemistry, and routing.
  • A battery inside the cabin/cargo area needs the right chemistry, containment, and ventilation assumptions for that specific battery.
  • High-current inverter use can outrun a casual accessory build fast; size the whole system before adding the inverter.
  • This is a build record, not a universal wiring diagram.
Highlights
Structure & Safety
  • Welded tray tied into structure (not interior trim)
  • Positive lead fused at source; strain relief at terminations
  • Abrasion protection and grommets at all pass-throughs
Usability
  • Central fuse block with labeled circuits
  • Room to expand for future accessories
  • Clean routing that keeps cargo usable
Need power done right?

I can design and build clean auxiliary power for your rig.

Tell me what you need to run and how you use the truck. I'll spec a mount, fusing, and distribution plan that won't strand you.

Contact

Share your vehicle, power needs, and any photos of the space you want to use. I'll get back to you right away.